Marketing automation is a powerful tool that automates email communications to your supporters. Entry criteria mean you can fine tune who should enter the automation, and drag-and-drop workflows can be built with delays and decision branches so you can build a highly customized journey with multiple steps.
Examples of their use are to create a welcome journey for new recruits, create a reactivation campaign that triggers emails when a supporter is not responding, or build a work flow that aims to convert your campaigners into donors.
Before you begin
Your objective
Decide on what your objective should be. Do you want to reactivate supporters? Or do you want to send emails to newly signed-up supporters asking them to take their first action? It is good to be clear on this, and choose one clear objective, as this will make the set-up process easier and will likely make the automation more successful.
Your data
How is your data structured? Will you be importing it, and if so how will you identify who they are? If they are existing supporters, how will you identify them and what kind of quantity are you expecting?
Opt-ins
Marketing automation works by forcing you to select an opt-in or several opt-ins to target. You will need to put an unsubscribe within each email that the automation sends. If they click the link, they will be removed from the automation and also their opt-in will be set to “no” (N).
We highly recommend excluding for your main opt-in as well (=N), because that criteria is respected during entry and at each email send. This means if someone unsubscribes outside of the automation process, they will also be unsubscribed from the automation.
Account preferences
It is important to first check your account preferences which can be accessed by users with subaccount privileges. The settings that control how automations work is accessed via the menu Hello YOURNAME > Account settings. In Account preferences on the left, the marketing automation settings are listed under Email Triggers. The following are important to consider:
- Prioritize email triggers (if checked, supporters can only be on one trigger at a time) – It is recommended that you tick this option so that supporters don’t get emailed multiple automations. If this is ticked, you can also prioritise your automations
- Cancel pending email when email trigger is inactivated – If this is checked then when you Stop an automation, any upcoming emails are removed from the queue, otherwise they will receive any triggered emails (but nothing from then on)
- Include supporters, active in journeys, to all outbound email broadcasts – If this is checked then supporters in automations are eligible to receive emails from Email Campaigns in addition to automations
Recommendations & notes
Please familiarize yourself with this document before launching your automation, or when troubleshooting. It contains frequently answered questions.
Create a new marketing automation
To create a new automation, go to the Email > Marketing Automation. Any existing automations will be listed here.
Click the button: ![]() and a new window will appear. From here you can choose from five types depending on your objectives.
and a new window will appear. From here you can choose from five types depending on your objectives.

- A general automation should be used if you want to send a set of emails and don’t want to set an objective that means the supporter leaves the automation. i.e. they will go from start to finish (unless they opt out of course). General automations can target new supporters or supporters entering a profile. Supporters can only ever enter these types of automations once.
- New to Donor automations are used to target supporters who are new to the account with the goal of making them donors. Supporters can only ever enter these types of automation once.
- New to First Action automations are used to target new supporters with the goal of having them participate in their first advocacy action. Supporters can only ever enter these types of automations once.
- Birthday Message automations will be sent to supporters on their birthday, or a set number of days before. The birthday is selected via the date in the supporter’s Supporter Birthday tagged field. Supporters can enter these types of automations more than once.
- Card Expiry automations will target supporters when their card is due to expire for any recurring gifts they have with you. You set a days offset to pre-warn supporters (NB. please ensure this is 31 days or less). It is recommended you connect this to a hub page so that they can change their expiry date there. Alternatively you can ask them to set up a new gift and link them to a donation page. Supporters can enter these types of automations more than once.
- Recurring Transaction Activity actions are used when supporters are regular donors. You can set up automations to remind supporters when a gift was successfully or unsuccessfully processed. Supporters can enter these types of automations more than once.
- Custom Date automation triggers email series based on a custom date field (formatted as YYYY-MM-DD). This type of automation can be used to send a reminder a number of days before or after a custom date present on the supporter record. Please note: supporters will be able to reenter the automation.
Settings screen
When you choose your automation objective, you are then required to give the automation a name and you can optionally add some notes.
Supporters selection screen
On the next screen, you can select who should enter your automation.
Note that these criteria are applied only to supporters when the first enter the automation, except for the exclusion criteria which is checked before each email in the workflow is sent. Exclusions are looked at before each email send as well.

This automation will target…
The first setting determines how a supporter will enter the automation. You have several choices, which will differ depending on the objective you have chosen:
- New supporters – Only supporters that are created after the automation is launched can be targeted by the automation
- Supporters who have donated – Supporters who donate (in any way within the platform) will enter the automation. You need to also set the number of days to look back on from the launch date of the automation. For example, if you launch the automation today and set “Within the last 1 days” then only supporters that donated from yesterday onwards will enter the automation. Note that supporters with recurring donations can only ever enter the automation once
- Supporters in the following profile – You can set up a profile (which are separate from the standard supporter profiles) so that supporters that are captured by the profile will enter the automation.
Include imported supporters?
If you leave this unchecked, then any supporters you import will not be included in the automation. If you check it, then a “New supporters” automation could count imported supporters since their creation date is set as the day they are imported.
Who belong to the following subscription lists
Specify the opt-in, or opt-ins, that allow a supporter to be emailed by the automation. This should be the opt-in question that, if set to Y, means you are allowed to contact that supporter by email. Anyone unsubscribing from the opt-in list during the automation will not get any further emails.
If you choose two or more opt-ins, it acts as an “OR”, so either can be true for them to enter the automation.
Filter the list based on these criteria
You can optionally filter the list of supporters specified by the opt-in clause you chose in the last step. For example, you could filter for those that took a specific action, donated towards an appeal, or who answered a specific question. You cannot filter by profile.
Exclude records based on these criteria
You can also optionally exclude supporters here. Note that exclusion criteria are used to exclude for supporters entering the workflow for the first time and is also checked on every email send. The opt-ins, inclusion, filters and profiles are not checked on every email send.
How marketing automations are timed
It is important to understand when processes fire so you know when your supporters will enter the automation and when emails will be sent.
When you create your automation, you will begin with a “Journey start” where you set your Frequency and Send Time (and timezone). This “send time” determines when the automation runs (i.e. when supporters enter the automation, when it evaluates conditions and when it sends emails).
Nothing will of course happen until you launch your automation.
Timings for automations that trigger for new supporters
After launch, when the first “Send time” is reached it’ll look back to the launch time to determine who is “new” and therefore who should be considered for the automation. The next day (or whatever frequency you chose) at the send time, it will look back to the last time the automation ran to determine who is new, and so on.
Timings for automations that trigger based on profiles
Audiences for automations are calculated throughout the day so we recommend planning ahead as it can take up to 48 hours for supporters to be drawn into the journey based on when you launch, when your daily/weekly email journey begins, and when the criteria or profile runs.
So if you have your automation’s “Send time” set before the profile is updated, it will use “yesterday’s” profile. If your launched automation is new and the send time is set before the profile will be first created, then it will not pick anyone up at the first send.
Also note that the very first send could be very large, since subsequent sends will only pick up supporters that have newly entered the profile, whereas the first will pick up everyone that matches the profile’s conditions when the profile is first created. If you don’t want the profile to retrospectively find all the supporters, add a ‘Support Create Date’ check to specify the profile should only pick up supporters since X date.
Supporter workflow
When you click Save on the previous screen, you will be taken to the builder in which you can assemble your automation.
The automation boxes
Simply drag and drop automation boxes from the left into the work area, and they will connect up with nearby boxes if the connection is valid. All automations start at the Journey Start box and then follow the arrows to subsequent stages. Decision boxes can split journeys depending on certain conditions. If you hover over the box, you will see the controls available.
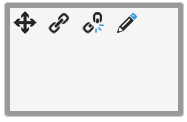
| Icon | Function |
| Move – this doesn’t effect the function of your automation, but just allows you to move the boxes around for visual reasons | |
|
Link – new boxes automatically link when dragged close to another but you can use this if you wish to link non-linked boxes together. Drag from the box to link from to the box to link to. Note: some connections are not possible, including from a Decision to a Wait, or from a Send Email to a Decision. |
|
| Unlink – if you wish to unlink the box, click this | |
| Edit – each box has its own settings which you access via this icon. For Journey Start, this amends the frequency of the automation. For Email Send, this amends the email content being sent. For Wait boxes, this amends the wait time. For Conditions, this amends the condition type | |
| Test – test emails by sending them to a recipient, e.g. yourself | |
| Delete – to remove the box from the work area, click this icon. Not possible for Journey Start |
Journey Start

All automations start with a Journey Start box. Edit the box to set the journey frequency. The frequency determines how often the automation checks for newly qualifying supporters and when any emails should be sent.

Weekly – This frequency will send on Sunday of each week
Daily – Audiences for automations are calculated throughout the day. Once the journey has been launched and the initial audience has been drawn into the journey, this will send daily at the Send time. (see note above regarding initial launch).
Actions – send email

An “Action” causes an email to be sent to those supporters at that stage of the journey. You create the email itself after you add the action into the automation. To add an action, drag the Actions component into the work area and join it up with the Journey Start box, a Wait box, or a Decisions (If) box.
If you connect it with the Journey Start, then as soon as the frequency of the automation kicks in, it will send the email to supporters that have entered the automation.
The next step is to click the edit icon on the Send Email box to load the email editor.
This works similarly to the email campaign editor. Email templates can be created by clicking Load From Library and then New Template. Make sure you include a way to unsubscribe from the opt-in you used to determine your automation selection.
Save the email to enter it into your automation.
Google Analytics and campaign references
When creating emails in the Email Marketing Automation tool, you can add campaign reference fields to each email in a workflow. Campaign references are accessible in the user interface when editing emails, and the resulting data will be exposed as part of the MBC transaction type in an export. Note: this feature must be enabled under the email settings initially.
You can also use Google Analytics if it is enabled in the email tool. Support for Google Analytics can be enabled and disabled in email settings.

Click the test icon ![]() to test the email.
to test the email.
Actions – send split test email
Split test emails allow you to test several emails to find out which one works best in your automation. It is recommended you create fresh emails when choosing which ones to include in your split test, rather than using pre-existing ones. Once the automation has ran for a certain amount of time, you can view the results and choose the winner so that upcoming emails use the most effective content. All new supporters added to the automation will be sent the winning email version.
Actions – Jump to Journey
When building a marketing automation, you can select “Jump to Journey” to add supporters into another marketing automation after completion of a journey, instead of simply ending the journey. Supporters from the original journey will get added to the next journey regardless of the criteria for the next journey. Exclusions are still applied for all instances.
Wait
A Wait box pauses the automation for a set amount of time (click edit to amend) and then evaluates any conditions and continues. This is useful spread out your communications over a period of time, and also in conjunction with Condition boxes to specify how long to wait before evaluating an outcome and deciding on what to do next.
In this example, the first email will go at 10am every day to supporters that have entered the automation, and then the second a week later.

Conditions
Decision boxes allow you to determine who gets certain emails depending on how your supporters interact. Decisions can also be used to branch the journey so that if a supporter acts in certain ways they can get sent different content.
To add a decision to your journey, drag a green Decision box after a Wait box. Click the edit icon on the box to set the condition.

There are seven different conditions to choose from, in order of priority. The conditions are checked after the time given by the previous Wait box. At this point the automation will determine which supporters continue down which branch.
The conditions are shown in order of priority, with the highest priority at the top of the list:
- Recurring Donation complete – a recurring donation was made (via a link within the email)
- Donation complete – a donation (recurring or one-off) was made (via a link within the email)
- Supporter Field – the supporter field condition(s) you set are true. You can set more than one condition, but all of them will need to be true. Note that this can only evaluate on supporter fields, not questions
- Page converted – the supporter took action (advocacy or donation page) via a link within the email
- Email clicked – a link within the email was clicked
- Email opened – the email was opened
- Email sent (unopened) – the email was sent but was not opened
Journey End
A journey end box completes the automation. It isn’t necessary to end a journey but can make your automation easier to read
Saving and editing your automation
Remember to click Save to your new automation. If you wish to edit the automation at a later date, just click the pencil icon next to the name of your automation. Note that saving an automation will not launch it – see the next step on how to make them live.
Once an automation is launched you cannot edit the journey beyond the content of the emails inside. If you amend these, then they will change straight away for supporters hitting that part of the journey. However, you are able to amend the the supporter selection screen that determines who will enter the automation.
If a supporter has been, or is currently in, an automation, they cannot re-enter if the automation is edited.
Launching your automation
New automations are marked as “INACTIVE” until you launch them. Once you are ready to launch your automation, click on the name of it in the automation list and click Launch. It will validate your automation and if it passes, then you can click Launch again and it will be marked as “ACTIVE”.
Pausing and stopping automations
Read this article for more information.
Viewing supporters in your automation
Click the users icon ![]() to see who is in your automation. This will list all the supporters who have entered but not finished.
to see who is in your automation. This will list all the supporters who have entered but not finished.
- First name and Last name give the name of the supporter
- Email gives the email address of the supporter
- Created gives the creation date of the supporter
- Added On gives the date the supporter entered the automation
 will show you where in the automation the supporter currently is
- will open the supporter record
- after confirmation, this will remove the supporter from your automation
You can also query on supporters using the query builder
Prioritising automations
Supporters may qualify for multiple automations at any one time. You can set the order that those supporters should qualify for first using the “Manage Priority” tool which is accessed above the automations list. To be able to use this you must enable “Prioritize email triggers (if checked, supporters can only be on one trigger at a time)” in your account settings. Simple drag the automation up or down (only launched automations can be prioritised).

Reporting
Click on the Reporting icon ![]() to see statistics on the automation. At the top under Quick Stats it will show you a summary of the journey so far.
to see statistics on the automation. At the top under Quick Stats it will show you a summary of the journey so far.
Visual reporting
Underneath this, you will see your automation journey displayed, along with stats displayed at the Journey Start and at each Email Send box, showing you how many emails have been sent at that point, along with a percentage of outcomes so far.
Note that the “Journey starts” number is only updated when an email has been sent within the automation.

Report export
If you click Generate Report, you will be able to download a detailed report giving you individual supporters’ results. Each row records a supporter’s interaction with an email, so there may be more than one row per supporter. The leftmost columns are the supporter record columns. After these, there are marketing automation-specific columns:
- Marketing Automation – the name of the marketing automation
- Sequence – the first email sent to the supporter in the date range selected has a sequence of 1, then 2, and so on
- Message received – the number of days since the journey started (e.g. J+2)
- Date sent – the date the email was sent
- Sent – Y means the email was successully sent
- Opened / Clicked / Converted – a Y in these columns shows whether the supporter opened, clicked, or converted from the email
- Donated / Currency / Recurring – details of the donation if one was given
- Unsubscribed – a Y here means the supporter unsusbcribed when receiving this email
- Complained – a Y here means the supporter marked the email as being spam